Have you ever noticed your cat shaking its head or scratching its ears? How do I clean my cat’s ears? is a question that many cat owners ask to ensure their feline friends remain comfortable and free from ear-related issues. Proper ear care is essential for your cat’s overall health, preventing infections, wax buildup, and other common ear problems. This guide will walk you through everything you need to know about cleaning your cat’s ears safely and effectively.
Contents
- 1 Understanding Your Cat’s Ears
- 2 Signs That Your Cat Needs an Ear Cleaning
- 3 Preparing to Clean Your Cat’s Ears
- 4 Step-by-Step Guide to Cleaning Your Cat’s Ears
- 5 Tips for a Successful Ear Cleaning Routine
- 6 Understanding Cat Behavior Related to Ear Care
- 7 When to Seek Veterinary Help
- 8 Choosing the Right Cat Breed for Ear Care
- 9 Daily Care Routine to Maintain Healthy Ears
- 10 Frequently Asked Questions (FAQs)
- 11 Conclusion
Understanding Your Cat’s Ears
Anatomy of a Cat’s Ear
A cat’s ear is a complex structure designed for acute hearing and balance. Understanding the anatomy can help you recognize what normal ears look like and identify any potential issues.
- Outer Ear (Pinna): The visible part that captures sound waves.
- Ear Canal: Leads from the outer ear to the middle and inner ear.
- Tympanic Membrane: Also known as the eardrum, it vibrates to transmit sound.
- Middle and Inner Ear: Contain structures responsible for hearing and balance.
Common Ear Problems in Cats
Cats can experience various ear issues, some of which can be prevented or managed with regular care:
- Ear Mites: Tiny parasites that cause intense itching and irritation.
- Infections: Bacterial or fungal infections resulting from moisture or debris buildup.
- Wax Buildup: Excessive wax can lead to discomfort and hearing problems.
- Foreign Objects: Small objects can get lodged in the ear canal, causing pain and infection.
Signs That Your Cat Needs an Ear Cleaning
Behavioral Indicators
Your cat may exhibit certain behaviors that indicate it’s time to clean its ears:
- Scratching or Rubbing Ears: Indicates irritation or discomfort.
- Head Shaking: A sign of discomfort or trying to dislodge something from the ear.
- Redness or Swelling: Visible signs of inflammation or infection.
- Unusual Odor: A foul smell can indicate an infection.
- Excessive Wax: Visible wax buildup may require cleaning.
Physical Signs
Inspecting your cat’s ears can help identify if cleaning is necessary:
- Debris or Wax: Visible accumulation inside the ear canal.
- Discharge: Presence of pus or fluid can signal infection.
- Darkening of the Ear Canal: Could indicate mites or chronic issues.
Preparing to Clean Your Cat’s Ears
Gathering Supplies
Having the right tools on hand makes the process smoother and more effective:
- Ear Cleaner: Use a vet-recommended ear cleaning solution.
- Cotton Balls or Gauze Pads: For applying the cleaner and wiping the ears.
- Towel: To wrap your cat and prevent scratches.
- Treats: To reward your cat and create a positive association.
- Gloves: Optional, for hygiene and protection.
Creating a Calm Environment
Cats are sensitive to their surroundings, so setting the right environment is crucial:
- Choose a Quiet Space: Minimize distractions and loud noises.
- Comfortable Position: Hold your cat securely, either on your lap or a stable surface.
- Gentle Handling: Speak softly and move slowly to keep your cat calm.
Step-by-Step Guide to Cleaning Your Cat’s Ears
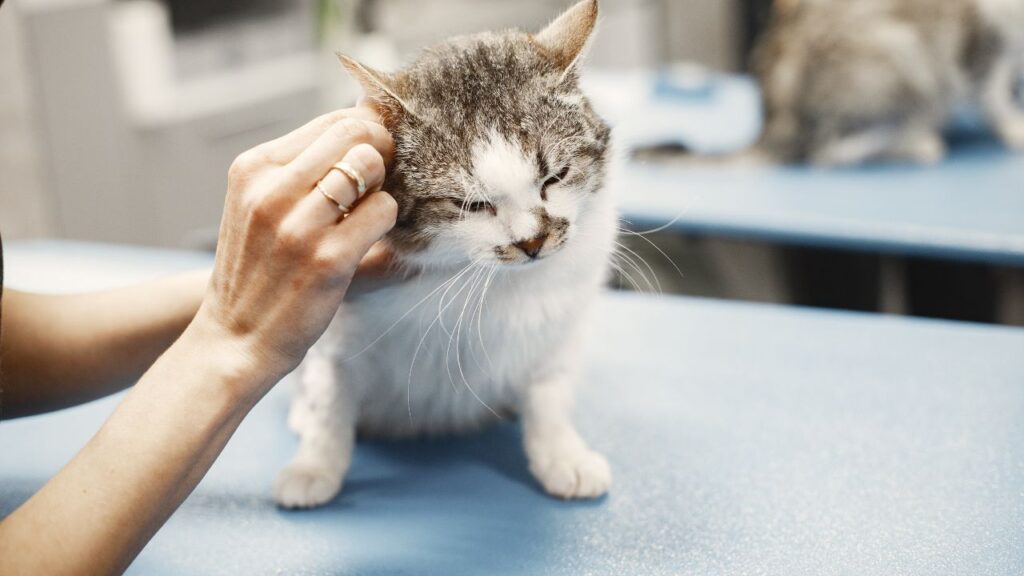
Step 1: Inspect the Ears
Before cleaning, take a moment to examine your cat’s ears:
- Look for Signs of Trouble: Check for redness, swelling, excessive wax, or discharge.
- Assess the Need for Cleaning: If the ears appear dirty or have a strong odor, proceed with cleaning.
Step 2: Apply the Ear Cleaner
Proper application ensures the cleaner reaches deep into the ear canal:
- Follow Product Instructions: Each ear cleaner may have specific guidelines.
- Gently Squeeze the Bottle: Apply the recommended amount into the ear canal.
- Massage the Base of the Ear: This helps distribute the cleaner and loosen debris.
Step 3: Let Your Cat Shake
Allowing your cat to shake its head can help expel debris and excess cleaner:
- Support Your Cat: Hold them securely to prevent sudden movements.
- Be Patient: It might take a few seconds for your cat to shake.
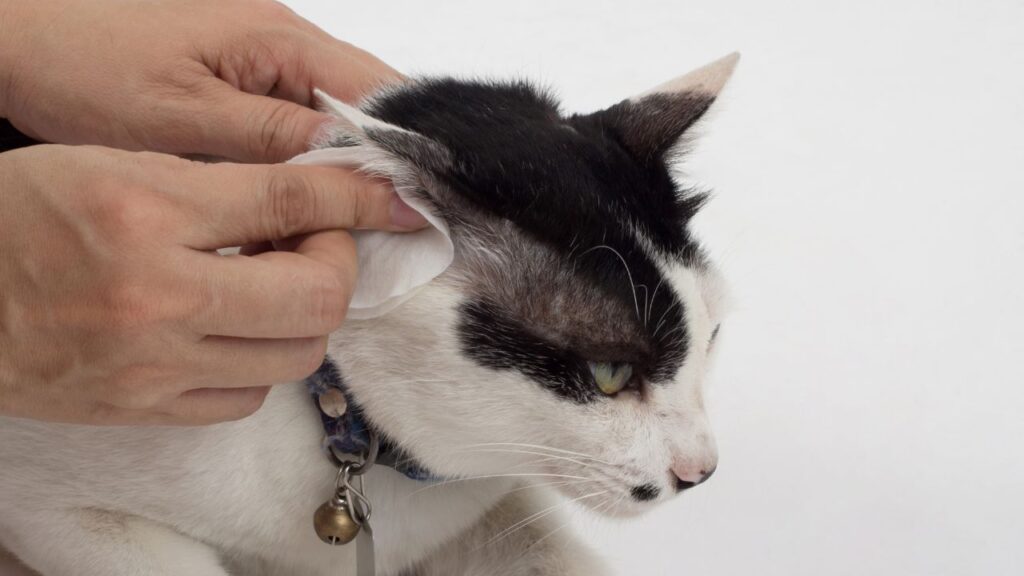
Step 4: Wipe the Ears
Cleaning the outer parts of the ears removes loosened debris:
- Use a Cotton Ball or Gauze Pad: Gently wipe the visible parts of the ear.
- Avoid Inserting Anything into the Ear Canal: This can cause injury or push debris further in.
Step 5: Reward Your Cat
Positive reinforcement makes future cleanings easier:
- Offer a Treat: Praise and reward your cat after cleaning.
- Keep Sessions Short: Gradually increase grooming time as your cat becomes more comfortable.
Tips for a Successful Ear Cleaning Routine
Frequency of Cleaning
- Regular Checks: Inspect your cat’s ears weekly for signs of issues.
- Cleaning Schedule: Typically, once a month is sufficient unless your cat has specific ear problems.
Handling Difficult Cats
- Stay Calm: Your calm demeanor helps soothe your cat.
- Take Breaks: If your cat becomes too stressed, pause and try again later.
- Seek Help: If you’re struggling, ask another person to assist or consult a veterinarian.
Choosing the Right Ear Cleaner
- Vet-Recommended Products: Always use cleaners approved by your veterinarian.
- Avoid Alcohol-Based Cleaners: These can dry out and irritate the ears.
Understanding Cat Behavior Related to Ear Care
Fear and Anxiety
Cats may fear ear cleaning due to previous negative experiences or sensitivity:
- Gradual Introduction: Start by touching your cat’s ears without cleaning to build trust.
- Associate with Positive Experiences: Pair ear touches with treats and praise.
Communication Through Body Language
Learning to read your cat’s signals can enhance the cleaning process:
- Relaxed Posture: Indicates comfort and readiness.
- Tense Muscles: Suggests discomfort or anxiety, requiring a gentle approach.
When to Seek Veterinary Help
Persistent Issues
If your cat shows ongoing signs of ear problems despite regular cleaning, consult your vet:
- Chronic Infections: May require prescription medication.
- Severe Ear Mites: Need specialized treatment.
- Signs of Pain: Such as constant scratching or head shaking.
Professional Ear Cleaning
In some cases, professional cleaning is necessary:
- Deep Cleaning: Vets have tools and expertise to clean deeper areas safely.
- Diagnosis: Identifying underlying issues that at-home cleaning can’t address.
Choosing the Right Cat Breed for Ear Care
Different cat breeds have varying grooming needs and susceptibility to ear problems. Selecting a breed that aligns with your ability to manage ear care can make a significant difference in your cat’s health.
| Breed | Coat Type | Ear Care Needs | Common Ear Issues |
|---|---|---|---|
| Persian | Long, dense | Regular grooming, frequent cleaning | Ear mites, infections |
| Siamese | Short, fine | Weekly checks, minimal cleaning | Lower ear issue risk |
| Maine Coon | Long, thick | Daily grooming, monthly cleaning | Ear mites, wax buildup |
| Sphynx | Hairless | Weekly skin cleaning, minimal ear care | Lower ear issue risk |
| British Shorthair | Short, dense | Weekly brushing, regular checks | Moderate ear issue risk |
Choose a breed that fits your grooming capabilities and ensures effective ear care.
Daily Care Routine to Maintain Healthy Ears
Establishing a consistent daily care routine helps keep your cat’s ears healthy:
| Morning Routine | Evening Routine |
|---|---|
| – Quick ear inspection for any signs of issues | – Thorough ear cleaning if needed |
| – Provide fresh water and balanced breakfast | – Gentle grooming and positive reinforcement |
| – Check for signs of ear irritation or mites | – Ensure a clean and calm environment |
| – Offer interactive playtime to reduce stress | – Inspect ears for wax buildup or debris |
Adapt your daily routine based on your cat’s specific needs and ear health.
Frequently Asked Questions (FAQs)
How often should I clean my cat’s ears?
Generally, cleaning your cat’s ears once a month is sufficient. However, cats with long hair, those prone to ear problems, or those who spend time outdoors may require more frequent cleanings. Always consult your veterinarian for personalized advice.
What if my cat resists having its ears cleaned?
If your cat resists, try making the experience as positive as possible. Use treats, speak softly, and be gentle. Start by simply touching their ears without cleaning to build trust. If resistance continues, seek help from a professional groomer or your vet.
Can I use human ear cleaners on my cat?
No, human ear cleaners are not suitable for cats. They can contain ingredients that irritate your cat’s sensitive ears. Always use a vet-recommended ear cleaning solution specifically formulated for cats.
What are the signs of an ear infection in cats?
Signs of an ear infection include excessive scratching, head shaking, redness or swelling in the ears, foul odor, discharge, and changes in behavior such as irritability or hiding.
How can I prevent ear mites in my cat?
Preventing ear mites involves regular grooming, keeping your cat’s environment clean, and minimizing contact with other animals that may carry mites. Regular veterinary check-ups can also help detect and treat ear mites early.
Conclusion
How do I clean my cat’s ears? Proper ear care is a vital aspect of maintaining your cat’s overall health and comfort. By understanding your cat’s ear anatomy, recognizing the signs that indicate cleaning is necessary, and following a consistent and gentle cleaning routine, you can ensure your cat’s ears remain healthy and free from common issues like mites and infections. Remember to create a positive and calm environment during the cleaning process, use the right tools, and consult your veterinarian if you encounter persistent problems. With these tips and strategies, you can make ear cleaning a seamless part of your cat care routine, fostering a healthy and happy relationship with your feline companion.